Simple wall socket replacement
Category Archives: Blog
Archery Target
Yes, I bought my six year old son a beginner compound bow and arrow set off amazon. I know you all probably think I’m crazy, so did Jennifer. She is convinced a future post will be regarding “emergency room tips and tricks”…or perhaps “what to do when you become impaled by an arrow.” No worries! I got this! 😛
Anyway after a bit of shopping on Amazon, primarily based on price then reviews as a secondary, I settled on the Bear Archery Scout Bow. After a little instruction Tristan was up and shooting at a cardboard box in the backyard. Tristan really dug shooting the bow and arrow but we soon damaged one arrow and broke another by bouncing them off our concrete retaining wall. The next day I went a local feed and tack store called Fox Feed located on Sierra Highway and bought three straw bales for targets. When I got home I decided that just throwing the straw bales in the grass wouldn’t be the best idea so I started to draw up plans for a wood L-shaped target that the straw bales could stack upon. I decided I would make a 4’x4′ back that rested on a 4’x3′ base.
My plans called for
- 6 – 2x4x8
- 1 – 4x4x8
- 1 – 4x8x3/8″ Plywood Sheet
I had Lowe’s cut all my wood into my designed lengths and took the pieces home for assembly.
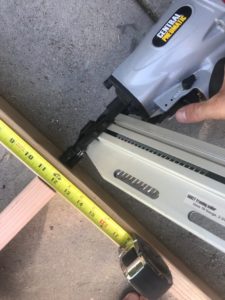
Yes, that is a Harbor Freight nail gun. Here is my theory on Harbor Freight…if it costs as much to rent the tool from Home Depot as it does to buy it at Harbor Freight, its worth the risk to buy and if it still works by the end of the job…YOU WON!

My sandal hit it’s limit on this project, next stop Ross for another pair. BTW Nothing like using a nail gun in flip-flops…Like I told Jennifer, its not like my tennis shoe would stop the nail any better. Also, look at it this way, if I do hit my foot they won’t have to ruin my shoe by cutting it off.
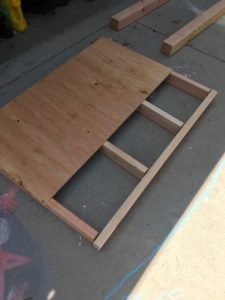
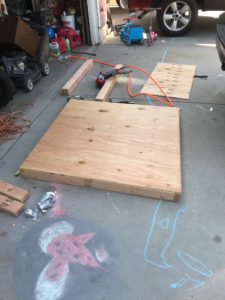
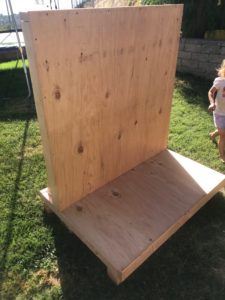
Here are the individual wall and base being made.
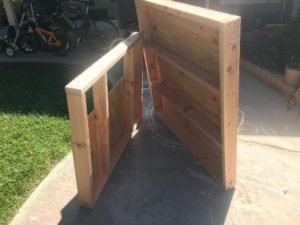
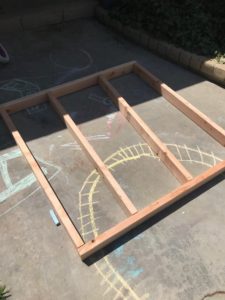
Here are the base (left) and wall (right) I carried them to the back before final assembly.
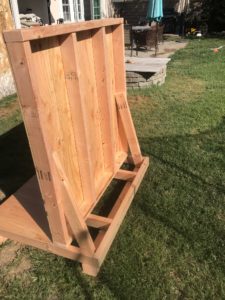
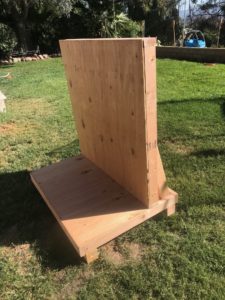
Here is the finished project. The based where the straw bales will rest is 2×4′ and the back is 4×4′

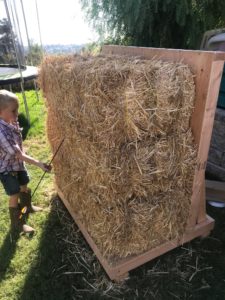
With the 3 straw bales
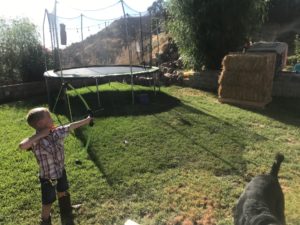
Tristan using the new target.
Total project cost:
- Straw – $30
- Lowes – $40
Our First Blog Post
When Jennifer and I both left of childhood homes, like many of you, we did so with very little in monetary value. Everything we have gained and lost in this life has been through our own hard work or ignorance, respectively. While we were making our way, a lot of the time we did not have the money to buy what we wanted or hire someone to make our home the way we wanted it to look. Instead, we had to make the things we wanted or figure it out ourselves. Well, while in the process of figuring things out the hard way we found out something quite unexpected. We found that there is a certain fulfillment when the mind and the hands (perhaps a bit of heart too) come into harmony to create.
Over the years this creative process of finding inspiration, planning and executing our visions has driven us to continually push our limits by trying new things. Through this process we have learned a lot. We create a lot but, we also fail a lot.
Our website and blog was created to document our design process, accomplishments and failures. It is our hope that you will find inspiration in our projects and create on your own without fear of failing.
Thank you and remember, if we can, you can 🙂
Jason & Jennifer